

Ok, I’m going to stop listing the steps as numbers. Eventually that number will get very high and make the process seem more overwhelming than it already is. We have come a long way on this since my first post. I just haven’t been great about keeping up with the posts.
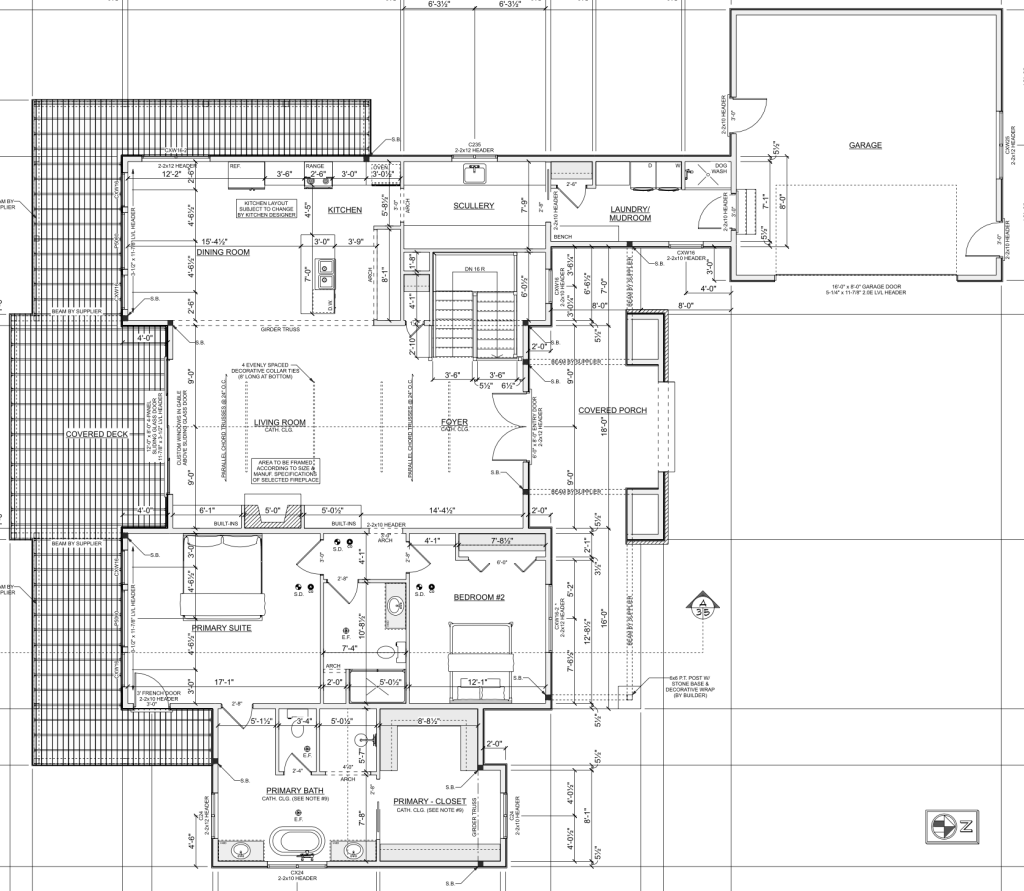
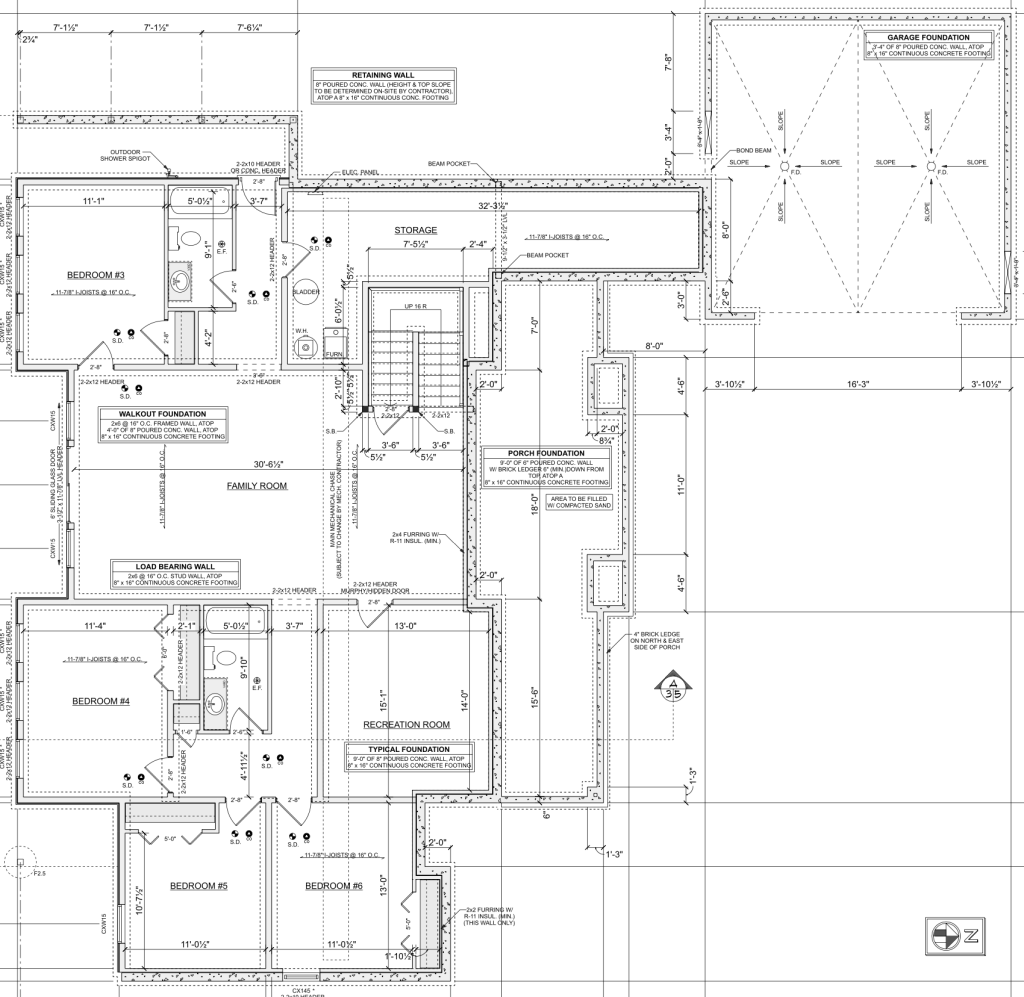
Let’s take a look at where we started and where we ended up with the layout. Like I mentioned there is a chicken and egg situation with the designer, builder, and architect. The builder can’t give an estimate on the total cost of construction without having accurate plans for the lumber yard to quote from. They create takeoffs which consist of specific materials (sizes and quantities). The designer can’t design without some sort of budgetary requirements. So what we did is we had our clients purchase a set of plans online. This gave us a basis for what they wanted, that we could provide to the lumberyard, to give us a somewhat accurate quote. As long as this fits with the client’s budget, we can move forward.
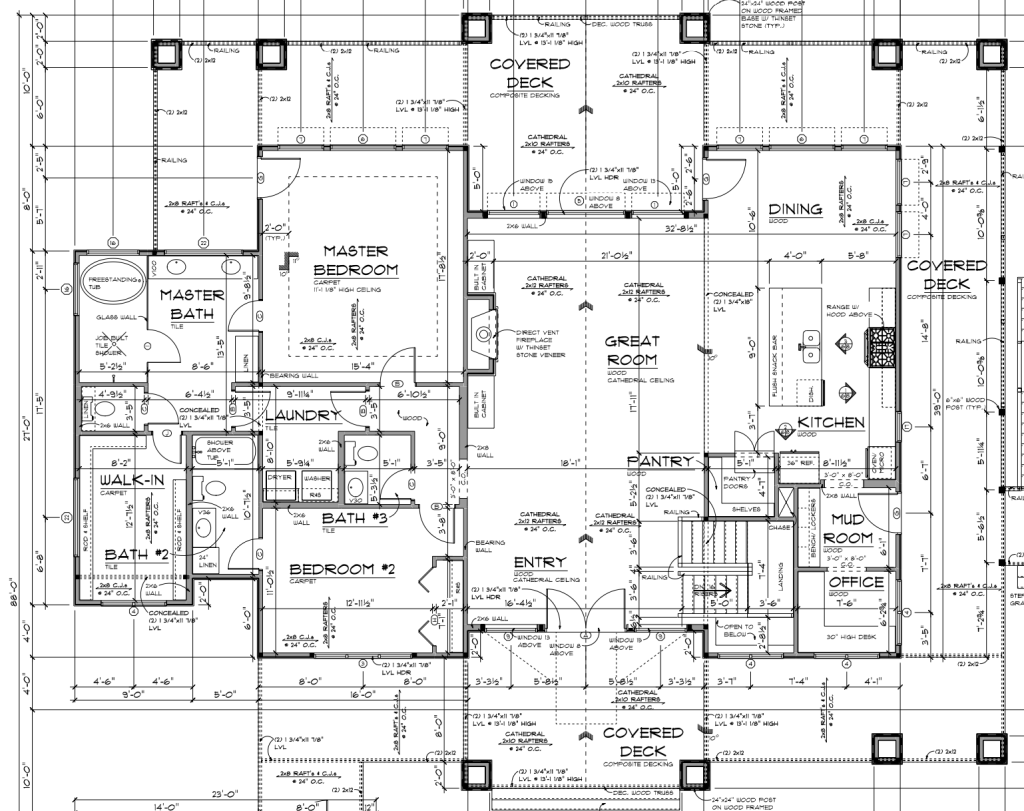
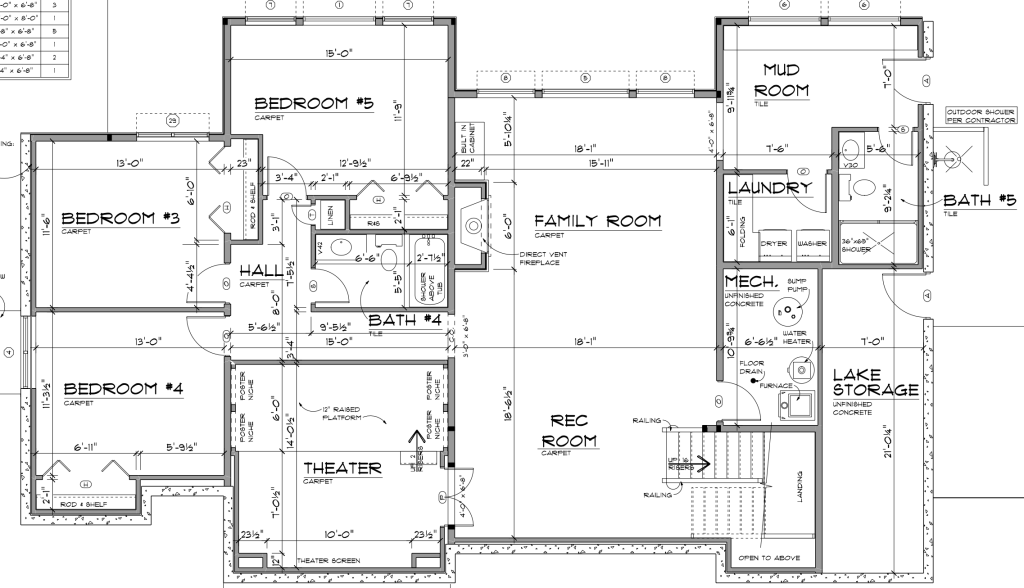
Then as the designer I revised the layout so that the home was exactly what they needed. Once that was complete, our architect redrew the plans. That was oversimplified. This took a few months. Plans that you purchase online usually are not a complete set, nor do they incorporate all building codes for all areas of the country. An architect is also not allowed to copy another architects work, so even the overall dimensions have changed. As you can see the final orientation is different, so it can be a bit hard to follow.
I am going to write another blog post to walk you through all of the changes we made to each floor. There isn’t much that stayed the same!

If you didn’t read our first post about this new construction project, you can read it here